Building a BFO Metal Detector
Here is a list of parts that you will need to build your metal detector. For this project I am connecting the metal detector to an arduino programmable controller ($30.00 from RadioShack). If you want to build just a regular metal detector that just makes sound all you have to do is replace the arduino with an 8 ohm speaker. This is also a handy thing to keep in mind if you have to troubleshoot this device.
At this point you will be assembling the circuitry of the metal detector. You will need all of the following items from the parts list along with a robot to install your metal detector on when you have completed this series as this tutorial assumes that you already have a robot.
- Parts list:
- Any 9v battery
- Small Gauge Copper Wire (J1, J2)
- 2x 220uF 16v electrolytic capacitor (C11, C12)
- 5x 0.01uF polyester capacitor (C6, C7, C8, C9, C10)
- 0.1uF polyester capacitor (C1, C2, C3, C4, C5)
- 10k 1/4 watt 5% resistor (R1, R2, R3, R4, R5, R9)
- 2.2m 1/4 watt 5% resistor (R6)
- 39k 1/4 watt 5% resistor (R7, R8)
- 2N2222A transistors - almost any NPN transistor will work (Q1, Q2, Q3, Q4, Q5, Q6)
- Arduino Uno
- Basic Stuff: wire, solder, soldering iron
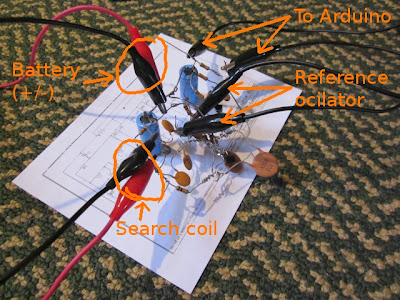
- Search coil (I1)
- Reference ocilator (I2)
 |
| (Click on this image to view it larger) |
Completing the circuit:
(Click any image to view it full screen)
 |
| Line up the parts with the corresponding symbol on the schematic. |
 |
| connection points to larger parts. |
 |
| Fully assembled circuit. |