Tampilkan postingan dengan label Salvius. Tampilkan semua postingan

Out for a drive...


Robot status page

Check out the robot's latest metrics from Salvius on the status page.

After creating the status page, I wanted to write a little bit about the technologies that went into creating it. The status page has been on my to-do list for a while now. I had originally considered having it be hosted on the robot's server, however the issue with doing that is if the server crashes, there is no way to access the status page. By having the status page be a simple static webpage which pulls from a variety of data sources, it makes it nearly impervious to complete failure. Even if the GitHub pages on which it is currently hosted were to become unavailable, the status page could be opened locally in a browser.

Many websites that provide online services provide useful status pages to display information about the sites performance and any potential service outages or problems. The idea for this page was to create a decentralized location to view statistics and data published by the robot. A few examples of status pages provided by different online services are from sites such as GitHub (status.github.com), Disqus (status.disqus.com) and Travis CI (status.travis-ci.com).

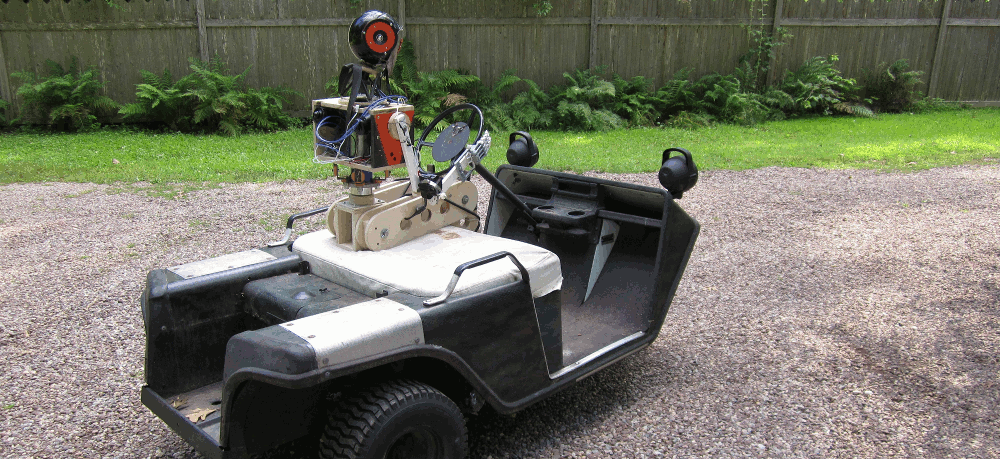
Salvius has a number of hardware items that report their status to various online sources. Out of an interest to see all of these metrics in one convenient location I created my own status page http://gunthercox.github.io/salvius.status/ which graphs data published by the robot.

The page is 100% responsive thanks to Bootstrap and Chart.js. Chart.js is a HTML5 canvas graphing library which has awesome support for different kinds of graphs. Although I only use the line graph, Chart.js supports a total of six different graph types to choose from.

The robot's status page pulls from a variety of data sources including Travis.CI, Sparkfun's data service, and Twitter. Travis.CI provides code testing services which are run each time a change is made to the robot's source code.
I was very interested to try out Sparkfun's data service which uses an application called Phant to host streams of various data submitted by a variety of networked electronic devices. Sparkfun is currently hosting data streams from sources such as homemade weather stations, GPS logging robots and more. The data service is meant to expose the reality of the Internet of Things. The Internet of Things is a term that came into recent popularity which describes the fact that there is more electronic devices connected to the internet then there is humans on the planet Earth. This has been true since 2008 when the number of devices connected to the internet reached 12 billion with the world population only at 6.7 billion. There is no end in sight to the ever increasing usefulness of interconnected technologies.

I'm planning to add graphs and metrics to this page as Salvius evolves and more sources of data become available. Idea submissions for graphs are welcome. Issue tracker: https://github.com/gunthercox/salvius.status/issues.

Update: I switched from Chart.js to chartist.js (see http://gionkunz.github.io/chartist-js/ for details). My main reason for switching was that chartist provides support for different aspect ratios which is useful when placing charts within responsive webpages. The second reason is that chartist also uses svg elements which has better browser support, and allows css animations to be applied to the graphs.

New arm mockup

In addition to a pair of new hands for the robot, I am also experimenting with a new design for the arm. At the moment I have created a mock-up in cardboard so that I can make changes easily. The new arm adds shoulder and wrist joints that were not previously included in the design.

Many thanks to +Western New England University for donating the pens which will be used to make two new hands for the robot. For anyone interested in how the pens will be used checkout my original post here. The driving force behind the design of this robot is to design a way for humanoid robots to be constructed with minimal costs by taking advantage of materials that are radially available, and also recycling to help reduce costs.

Happy Earth day everyone and thank you for your continued support!

Redesigned rotary movement for shoulder

I've moved the motor that rotates the robot's arm inside of the chest cavity to save space. The previous arm configuration was based off of one of my first tests for mounting the robot's arms which used a motor mounted in the arm. Mounting the motor inside of the robot's chest cavity will allow me to reduce the weight of the robot's arms for future versions.

I'm currently modeling a new left arm for the robot which will incorporate more joints for an improved range of motion.

Arc reactor installation complete

The photo above shows the robot's arc reactor which, as of April 1st, 2014 has been fully installed. This upgrade will provide enough electrical output to fuel the robot's tremendous power requirements. Currently I'm using a small sample of palladium to catalyst the fission reaction in the arc reactor, however it seems that the reactor is accumulating excessive quantities of neutrinos which have been building up on the surface of the laser emitter array. Once I determine an efficient way to keep neutrinos out of the arc reaction I have estimated that the final output should yield exactly 1.21 gigawatts of clean usable energy.

Salvius's Brain

Salvius's brain is a network of microprocessors which receive and carry out various functions based on input from the robot's API. In other words, what follows will be some insight into the logic behind this collection of components housed in Altoids tins and held together with rubber bands. Salvius uses several controllers connected through I2C (two wire connections). An important feature of this network is that work is distributed over multiple processors, this provides many advantages. For example, if one of the controllers fails, it does not greatly affect any of the controllers. A hardware failure may cause the robot may loose the ability to speak or receive input, but the likeliness of multiple simultaneous errors is very low. The modular nature of this setup also makes it easy to add and remove controllers to the network.

A central nervous system

Similar to the robot's brain, a network of I2C compatible motor controllers receives commands from the brain and responds by carrying out a corresponding action. This is a lot like the central nervous system seen in animals which has some processing power of its own. At the moment, Salvius's central nervous system is limited to the movement of the head and arms, however work is in progress to extend motor control to the robot's legs.

Bought Pi with Bitcoin

I have made my first purchase with Bitcoin. I am now the proud owner of Raspberry Pi which I bought from Adafruit. I didn't know about this until I went to Adafriut's checkout page where I saw the option to pay with Bitcoin and I have to say that this is pretty awesome that they are doing this! I also have to thank Yuri Yerofeyev for his bitcoin contribution which made this possible.

The Raspberry Pi boots from an SD card so I have loaded Raspbian onto a 4GB card and I'm looking to incorporate this tiny computer into my robotics project as Salvius's new main computer because it will weigh a lot less and having the laptop on there was overkill anyway. The Pi is a perfect fit for my projects because it gives me the processing power I need to run a light weight embedded server for controlling the robot. For its size the Pi has some pretty nice stats, in fact it out preforms my old IBM Thinkpad A21p.

Breakdown of the Raspberry Pi Model B Revision 2:
  • Broadcom BCM2835 700MHz ARM1176JZFS processor with FPU and Videocore 4 GPU
  • GPU provides Open GL ES 2.0, hardware-accelerated OpenVG, and 1080p30 H.264 high-profile decode
  • GPU is capable of 1Gpixel/s, 1.5Gtexel/s or 24GFLOPs with texture filtering and DMA infrastructure
  • 512MB RAM
  • 10/100 BaseT Ethernet
  • HDMI
  • Two USB 2.0
  • RCA video
  • SD card socket
  • Powered from microUSB socket
  • 3.5 mm audio out jack
  • Size: 85.6 x 56 x 21 mm
From here
The setup for the Pi was relatively straight forward. My only recommendation to new users is to make sure that your SD card is formatted correctly and that you don't unplug your Pi before the setup is complete! A nice feature about the Raspberry Pi is that it can be run headless (no monitor) so I plan on setting mine up with SSH and the web interface that I have designed for controlling Salvius.

Robot with no off switch

Movies like Terminator characterize advanced robots that can hijack vehicles and punch through cement walls. In reality a bigger issue that we really have to look out for is more along the lines of when a robot that decides to run away from home. When working with programming robots that can navigate autonomously a few problems can arrive. One of these problems is the fact that a few lines of code containing less that ten characters in total can make the difference between a robot speeding away from you down the hall or safely making its way into the kitchen to get you a drink. Despite what popular culture might lead one to believe it is actually more realistic that a programming error would simply cause a robot to cease to be able to move rather than turning on its human creators in a destructive rampage. The reason behind this is because computers only do what we tell them to so next time your robot programmer tells you that the robot has malfunctioned and as a result has become inherently evil you should simply fire him because he has programmed the robot to do so.

What i'm leading into is my latest improvement on Salvius. Yes that's right; I have installed an ON switch! OK, I get the fact that it's no big deal because pretty much everything that uses electricity has one but for my robot I want to change the way we think about electronics. As you can see in the picture bellow, Salvius has a button and a switch mounted in the recessed space on the left side of the head. The switch is used to set the robot's heat sensitive motion sensor that will "wake up" the robot if someone enters the room. The button however, turns the robot on immediately. Neither one of these controls turns the robot off.

Salvius is designed to be able to interact with humans and thus why this robot is built to look at least somewhat human. A human-like appearance makes interaction easier as well as allowing Salvius to take the place of any person and use tools designed for people. There is in fact no off switch physically on the robot anywhere that is accessible while the robot is turned on. Because many of the instructions that Salvius can understand are given in computer code directly to the robot's main computer; the only way to deactivate the robot is by sending a "sudo shutdown -h now" command to the robots computer while connected to it using SSH. This is actually more convenient than it may sound because you can turn off the robot if it is in another room without even having to be present. It also helps if the robot decides to drive full speed away from where you are standing because running after a robot to try to switch it off can be pretty difficult!

Open Source Humanoid Robots

This is a list I have been compiled of open source humanoid robot projects. I wanted to show the contrast between each project in costs, robotic capabilities, and in value as educational resources.

It will be interesting to see how Salvius and other open source humanoid robots will continue to evolve over time. I haven't come across any other projects that involve robots that are like Salvius; referring to height and bipedal modality in an open source platform. Most other robots that are both open source an bipedal humanoids have limitations in their design due to their height. Smaller humanoids are still significant educational tools but a robot that is 60 cm tall will never be able to pull a person out of a burning building (referring to things like the DARPA robot challenge).

Open source code in robotics can make a huge difference because anyone can contribute changes and modifications to make the robot better. I think it is particularly important for humanoid robots like Salvius to be developed because a there are significant challenges to overcome when building larger robots. These challenges can be costly, one of the biggest being getting the robot mobile. Making a robot walk is undoubtedly one of the most difficult challenges that roboticists can face. The point here being that a robot that is 2 meters tall has to interact with gravity completely different than a robot that is a sixth that size.

Salvius

Salvius is completely open source. The entire construction process to date has been documented on this blog in periodic posts showing each development. The robot is designed to be built with a budget by recycling parts and incorporating commonly available items into the robot's design. The robot also has a very modular design which allows parts to be easily exchanged. If a developer wants to build the robot using variants of motors or other components it is easy to do so. All of  the source code written for Salvius available online.
Height: 6 feet
Cost: approximately $3000.00 USD


iCub

The source code is available through the SVN repository on SourceForge. That’s normal practice, you access the source through SVN and have pre-packaged binaries to install the major libraries without recompiling. BTW: the binaries contain also all header files needed for developing new applications for the iCub. The iCub code is mostly C++ although small amounts of Python were also used. The same SVN repository also contains  the hardware design (mechanical and electronics file).
Cost: 250.000 Euros

DARwIn-OP

DarwIn-OP is a humanoid robot who's name stands for Dynamic Anthropomorphic Robot with Intelligence–Open Platform. The robot is currently backed by $1.2 million in NSF grants and has been distributed to over 14 institutions.

DARwIn-OP’s hardware and software are open-source.
Height:  455 mm (18 in)
Cost: $12,000 ($9,600 with an educational discount)


NimbRo-OP

NimbRo-OP is an open source robot developed at the University Of Bonn in Germany.
Height: 95cm
Cost: 22.000€


There is also many non-open source humanoid robots that represent extraordinary advancements in technology. Check out this list of a few of my favorites.

Geared Hexpod Neck


Because the sole purpose of a neck is to connect one's head to their body.
I recently replaced the large motor that I had been using to control the robot's head with a smaller servo. Although the servo has less torque it also carries many advantages. I still need to get a servo controller but once I do I will be able to get and set the position of the servo in degrees. I used two of the same gears so that I retain a 1:1 gear ratio so the degrees that the servo rotates will be the same as the degrees that the head rotates. The other advantages of the servo motor are that it is lighter weight, smaller in volume, consumes less power, and in general gives me greater control over the movement of the robot's neck.
The reason that I can get away with using the smaller servo is that all of the weight of the robot's head is supported by the universal joint at the center and the elastic supports on the sides. The elastic supports are just made from a strip of a used motorcycle inner tube. I choose the inner toob because the polymer material that it is made out of is denser and more durable than the polymer used to make rubber bands or surgical tubing. I still need some sort of linear actuators to control the position of the head in place of my elastic support system. Linear servos go for about $90.00 USD a piece and I would prefer to use something that was at most $15.00 just to keep the cost down. Ideally I would be able to create my own electromorphic  polymer but I'm not really sure how to do that, yet.

Torso Brackets

Today I finished assembling a set of brackets that are needed to attach the upper and lower half of the robot's body. I designed the brackets with two aspects in mind, the first is that they need to be able to absorb shocks and vibrations that the robot will be subjected to when it is walking. The second design aspect is that they also cannot pivot on their own because the left and right motion of the robot's torso motor needs to be rigid enough for precise shifts in center of gravity when making each step.

The brackets are made from 2 inch steel angle stock that I cut into eight small brackets. The brackets are bolted together with pieces of awesome orange rubber acting as shock absorbers in key locations.


Here you can see the completed brackets attached to the housing of the motor and the frame of the robot.

Sensors Compared to Human Senses

Sight: A 1.3 MP Logitech Webcam C110 serves as Salvius’s eye. The robot also uses a PIR (passive infrared) to detect body heat.

Hearing: Salvius detects audio using a piezoelectric mic element. The microphone is standard but an amplifier has been constructed for the robot that clarifies and focuses the sound waves detected by the mic element. This is similar to how the human ear works to amplify sound waves. The only limiting factor for the robot is the quality of the mic element.

Touch: Many touch sensors have been embedded throughout the robots design in order to detect when parts of the robot come in contact with other objects.

Smell: At this time Salvus has no method of detecting smell but in future plans will have a gas detecting sensor. Commercially available sensors can be used to detect a range of gasses such as the Alcohol Gas Sensor, Methane CNG Gas Sensor, Hydrogen Gas Sensor, Carbon Monoxide Sensor 

Taste: Taste is a sense that is closely related to the ability to detect and differentiate smells. However to represent a sense of taste a pH sensors could be used to detect acidity of materials dissolved in water.

Salvius Robot App in Chrome Web Store

This was my latest quick creation. I decided to try out publishing to the Chrome Web Store. The store lets you publish free or paid apps that users can add to Chrome. The only catch is a small developers fee which I really didn't mind.

At the moment the "Salvius Robot App" is simply a link to this site (similar to how the gmail, blogger, or many other apps are). Eventually I would like to incorporate more features into the app. I have an idea for a few robotics tools that may be useful but until then, that's all folks!


Check out "Salvius Robot App": https://chrome.google.com/webstore/detail/salvius-robot-app/hfdhnedmdoakigghfnaijoaklfminhbf?utm_source=blogger

Transition to Biped

Salvius is now sitting high in preparation for a new achievement, bipedal walking! I've attached the new pair of legs to the robot using four car-door shock absorbers. All that remains to be done is creating a few small brackets that will reattach the torso motor to the upper body of the robot. These brackets are a critical part of the robot's new design because the large motor that controls the left and right movement of the upper body is needed to shift the center of gravity from one leg to another.

Arduino Setup with Server

A slave Arduino Uno connected to a master Arduino Leonardo with an Ethernet shield connected to a wireless router connected to a Ubuntu server.


This is my latest modification to the robot. In addition this setup of controllers has a relay shield and a motor shield that allow it to control a few of the robot's functions. I'm setting up the server to communicate with the master Arduino so that I can control the robot from a webpage. The server is running Tomcat so that I can write programs in Java to interact with the Arduino. The Arduino IDE is written in Java and that should make integration between these devices much smoother.

I've pushed my latest code to GitHub so now that I have the hardware hooked up I can start working on integrating the ability to control the Arduino. My goal is to create a  tool that will make the development of the robot easier, while at the same time, integrating development tools with the robot's control interface.

GitHub Repository: https://github.com/gunthercox/salvius

Salvius makes front page of Wilbraham Times

Salvius made the front page of the Wilbraham Times! The article in this local newspaper explains the story behind the development of the robot and tells about why Salvius was created. The article also has a call to action for donations to help develop legs and get the robot to be able to walk on his own.

The photos below shows the article featuring Salvius on the front page of the local news paper! For a pdf copy of the news paper see: http://www.wilbrahamtimes.com/pdfs/wht01.17.13.pdf

Hardware Arrangement

Today I cleaned up the robot's wiring by moving the robot's router and two Arduinos to the front cavity in the robot's chest. To do this I had to replace the plywood piece that was behind the robot's computer with a thinner piece of luan. The move centralizes electronic components and eliminates several feet of wires which now take up only a few inches. The only disadvantage is that this places the robot's most vital components in a vulnerable location; as a solution I plan on making a protective cage that will fit over them. The cage will both act as a Faraday cage as well as a protective enclosure to prevent objects from contacting the electronic components.

Salvius Writes!

This is the result of the robot's latest feature: the ability to write. The image bellow shows the robot's name written using the x - y grid system that I set up on its Arduino's.

The x - y grid is used to convert letters into efficient sets of straight lines so that each letter can be drawn as efficient as possible.


Arm Modifications Complete

The modifications to the robot's arms will allow the robot to write easier with greater clarity. The arm on the right side is now sturdier and weighs less than 3 lbs. The arm on the left side will not be used for writing at the moment but eventually the robot will have the ability to ambidextrously write messages. I plan on updating the robot's repositories on gitHub once I complete the code for writing. The left forearm still needs to be replaced using lighter weight materials but for now I will be focusing on the robot's ability to write for my fundraiser. The video bellow show my test for the movement of the new arms.


The photos below are from a few days ago when I was mocking up the changes for the new are. As you can see, the new arm piece that I have used to replace the old one makes the robot's arm sturdier and lighter weight.

User Interface

This is a screenshot of the robot's user interface that allows it to be controlled remotely with any wireless device. The interface runs locally on the robot's built in server so any device that can connect to the internet can connect to the robot. The interface currently only supports teleoperation (remote controlling) of the robot but I have included a button that will eventually allow me to set the robot to operate autonomously by default. The blue reset button will restart all of the robots systems in case of an error.

From the main screen of the interface you can see input from the robot's camera. The buttons allow inferred or ultraviolet lights to be activated to help the robot see in dark places. The slider will control the movement of the robot's head left and right and the text box bellow that will let you type text that you want the robot to say. The directional controls at the bottom of the screen control what direction the robot will walk.

I haven't designed controls for the arms yet. My goal is to keep the interface as simple to use as possible but eventually I would like to design a feature where the robot's computer maps out what the camera is seeing to identify objects. You would then be able to select an object that the robot is looking at and have it pick it up or do some task with it.

Older Post ►
 

Copyright 2011 robot recycled parts is proudly powered by blogger.com